
Here are guides on how to install and configure Proxmox Virtualized, Containerized or Emulated Machines on your computer system.
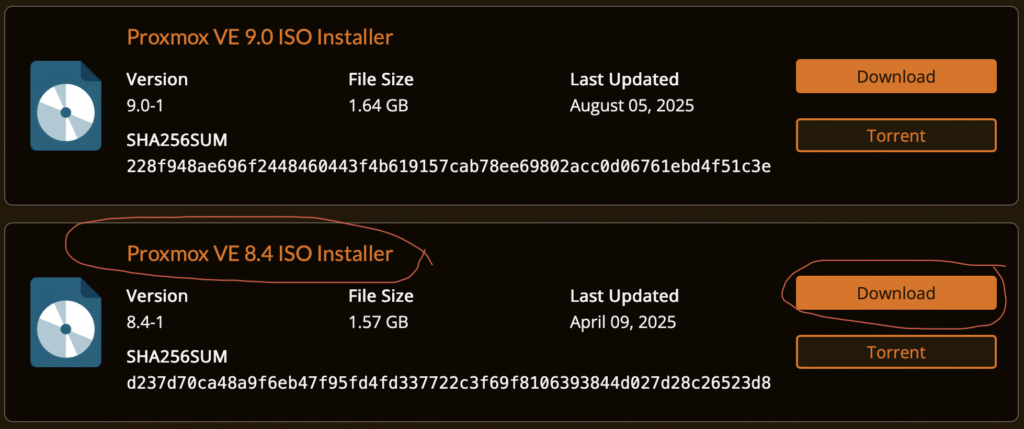
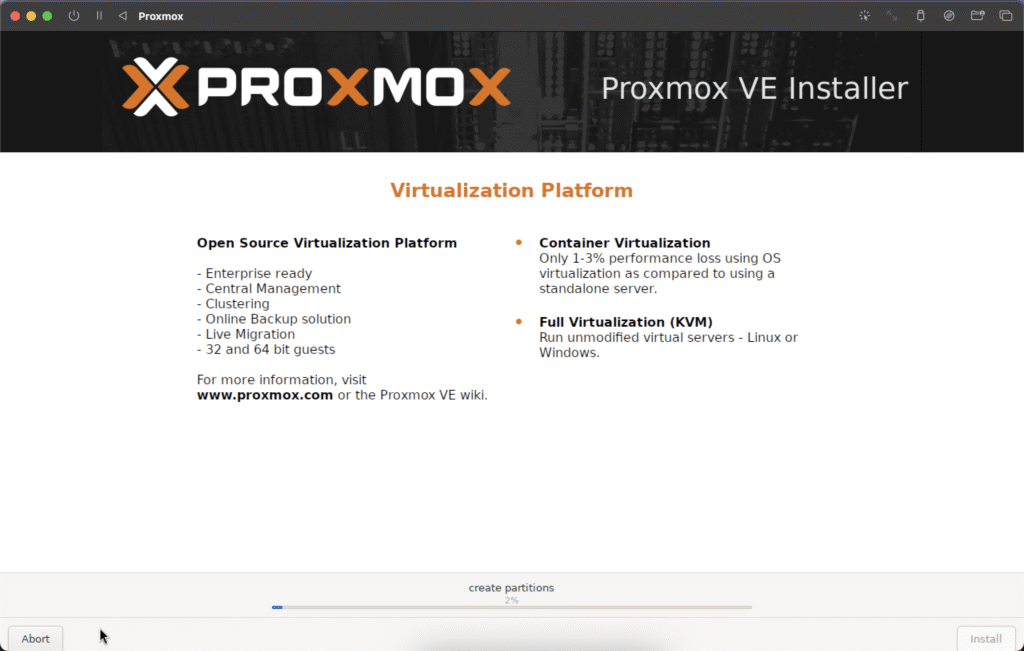
First Head over to the product download website and download a copy of the Proxmox VE 8.4 ISO Installer (this Version of Proxmox allows for easy and automatic set up or installation of various VM’s and containers using scripts, you can also easily update it to the latest version after installation) or the latest Proxmox VE 9 ISO installer (as at the time of writing this guide Proxmox version 9 was rather still new and full scripting support is not yet updated). This is the installation file we will be using for both PC x86 & MacOSX installations.
Proxmox Installation Guide
Directly (barebone) on an x86 Computer System
The BAREBONE option is for those who want to have only Proxmox as boot-able the operating system on their computer. This means there will be no available operating system for either Windows or Linux on the computer. Proxmox we will be the default operating system on the computer.
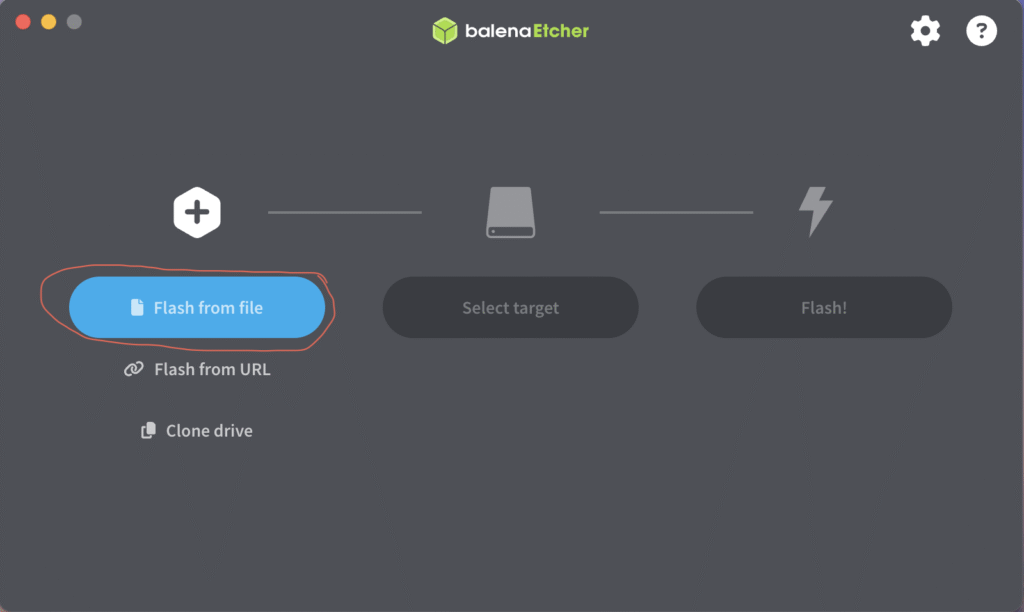
The the first thing to do is download the ISO installation file from the product link above, then find an external storage drive where you will flash the ISO installation file into in order to create a boot-able device. You can use a simple flash drive and the software Balena Etcher to create such a bootable media drive. See the steps below,
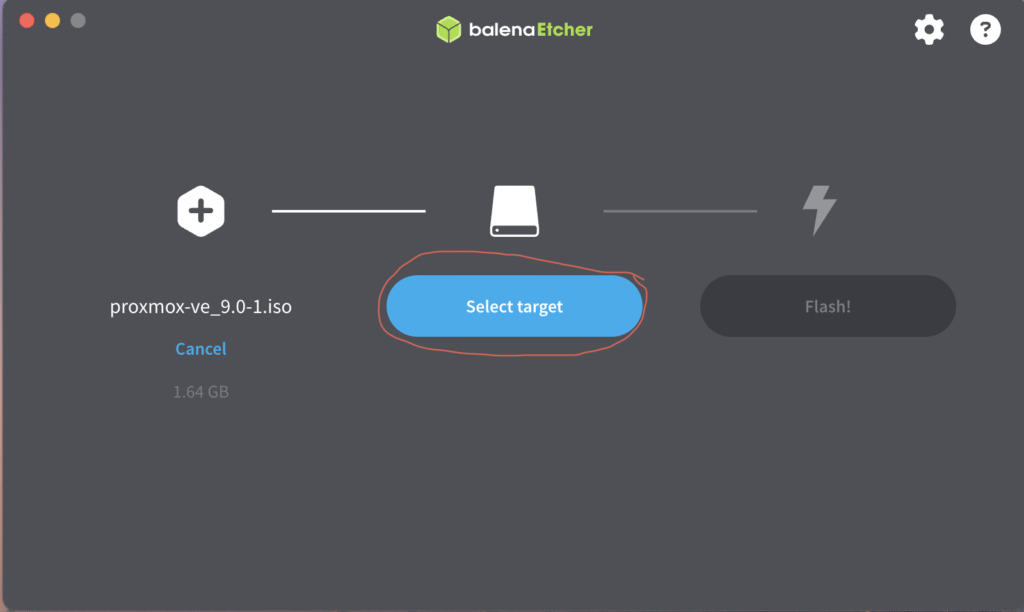
Open up Balena Etcher and click the FLASH FROM FILE button to select the Proxmox .ISO file you downloaded,
click the SELECT TARGET button to choose the removable media or flash drive you wish to use in installing Proxmox,
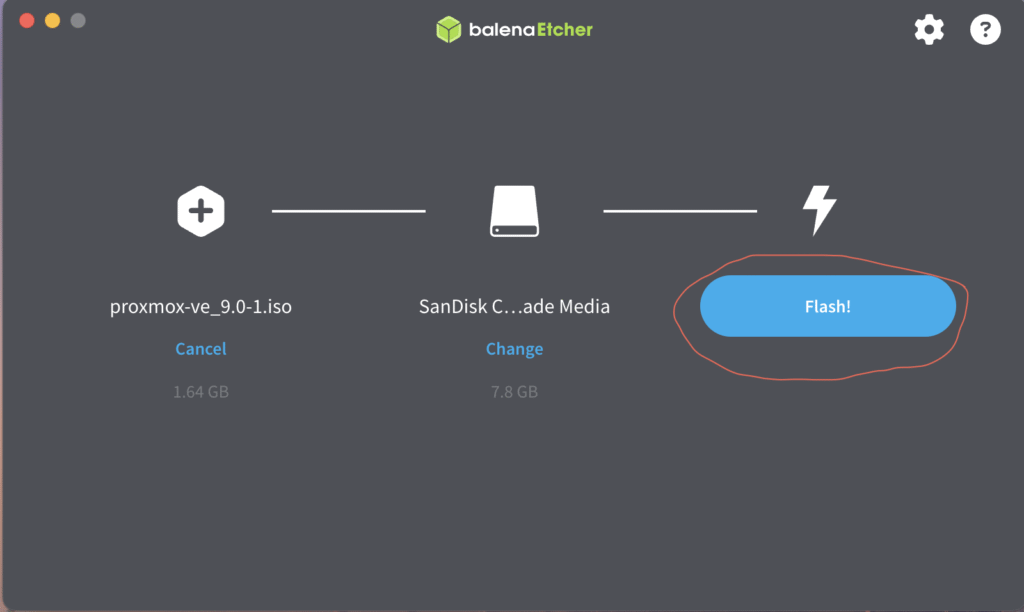
Then click on the FLASH button to begin writing the installation file to the flash drive,
Then, next thing to do would be to head over to your computers BIOS configuration menu screen (this is usually performed by holding one or two combination of keyboard buttons while resetting the computer), heading over to the boots options configuration menu, and enabling the option to boot from an external USB drive. After doing this you can plug in the boot-able flash drive with your copy of the Proxmox ISO and restart your computer to begin installation.

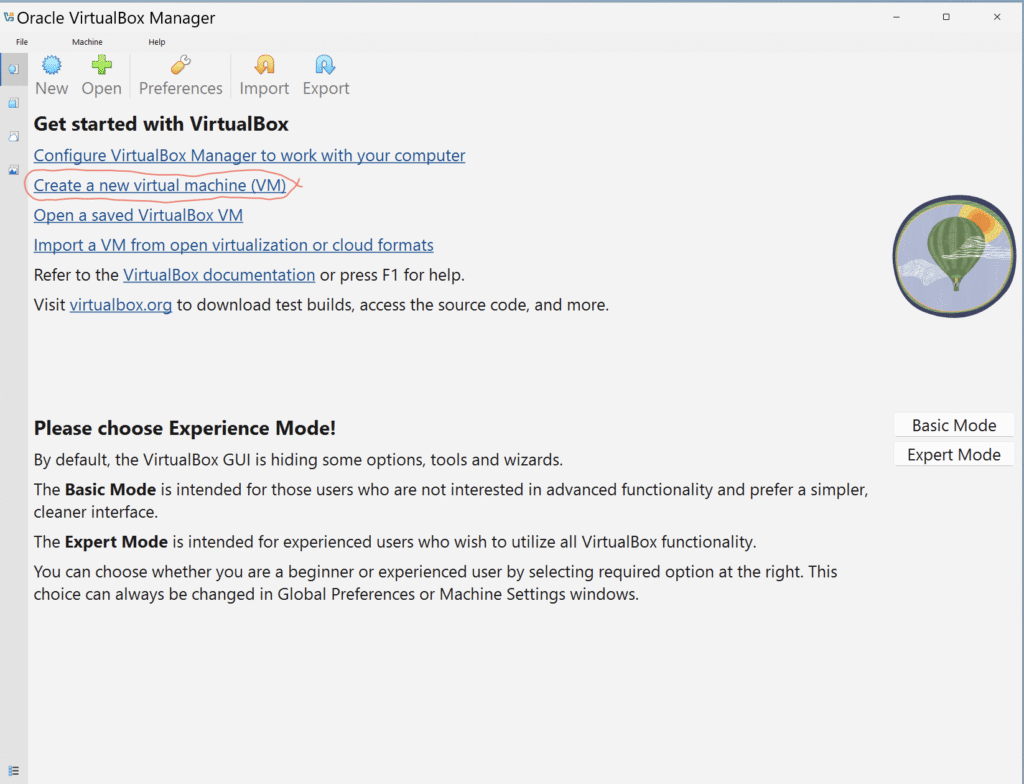
Install PROXMOX VE On Hypervisors (UTM or VIRTUALBOX)
for Mac & PC
While on a hypervisor (Virtualization Software), you just need to download and save the ISO file somewhere on your computer system. During installation, you will only need to point the installer to the location where you saved the Proxmox ISO file to begin installation.


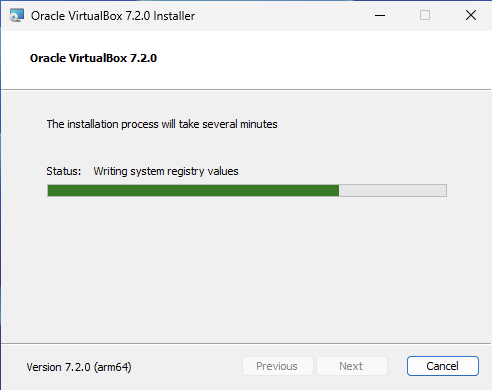
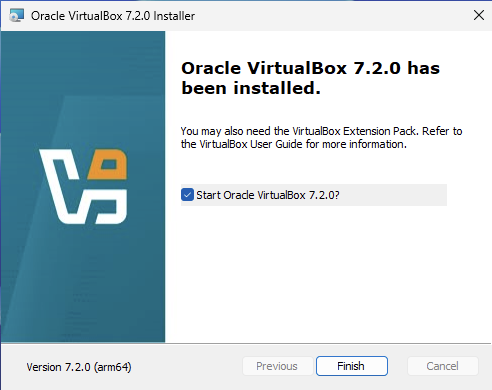
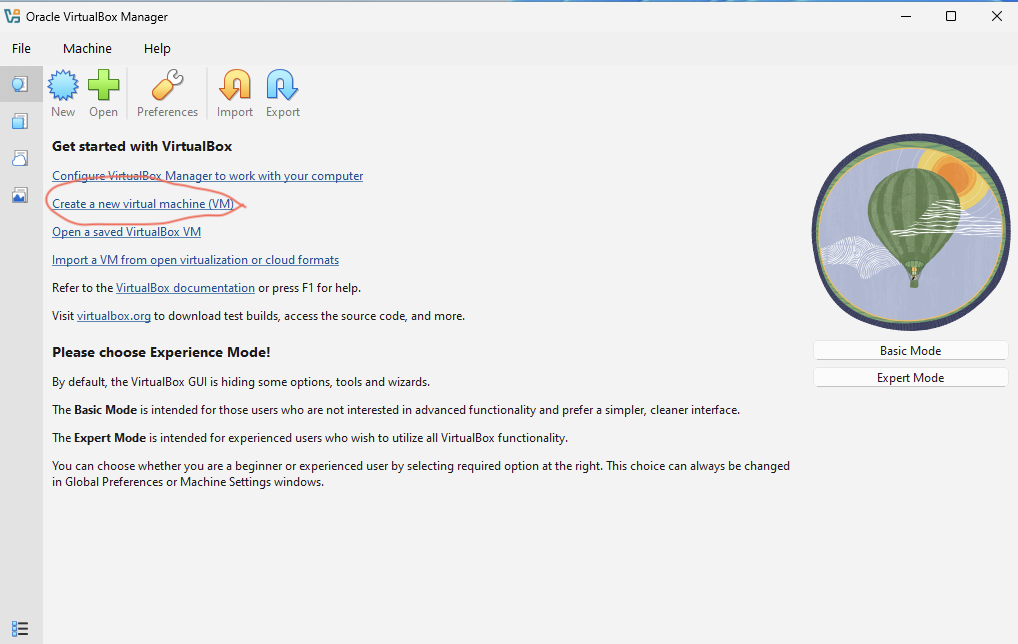
First download the VirtualBox application for x86_x64 Windows, intel Mac and Linux HERE or the UTM for apple silicon Mac HERE and install it on your computer. After the installation is completed launch the VirtualBox or UTM application so you can begin setting up Proxmox on it.
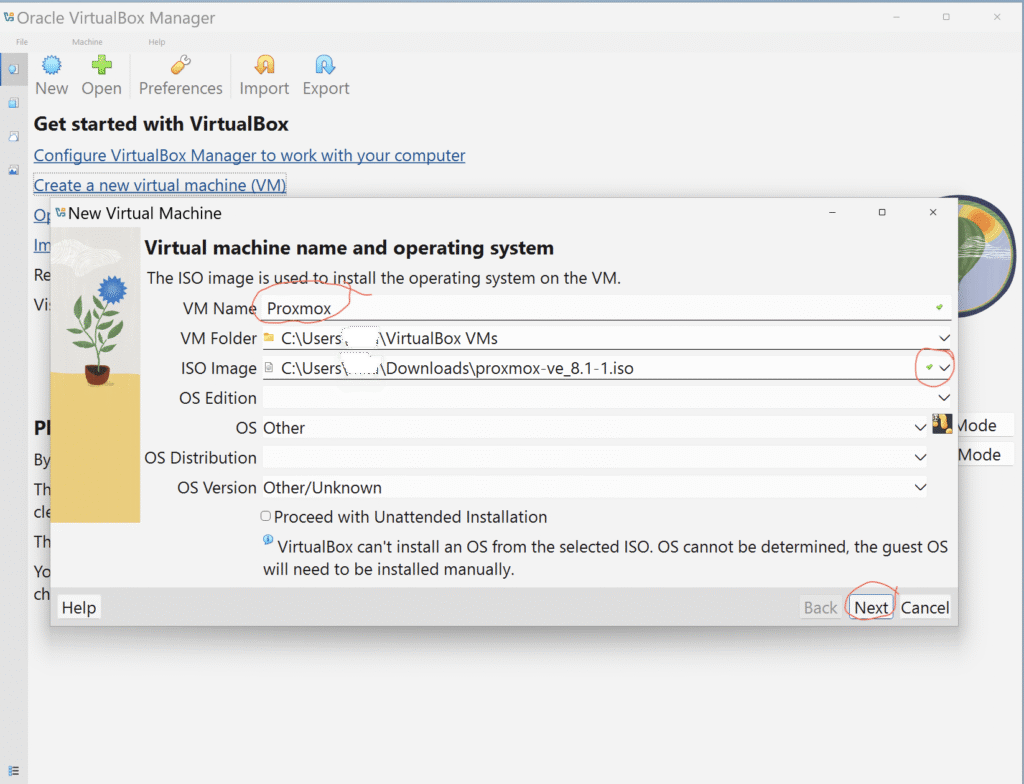
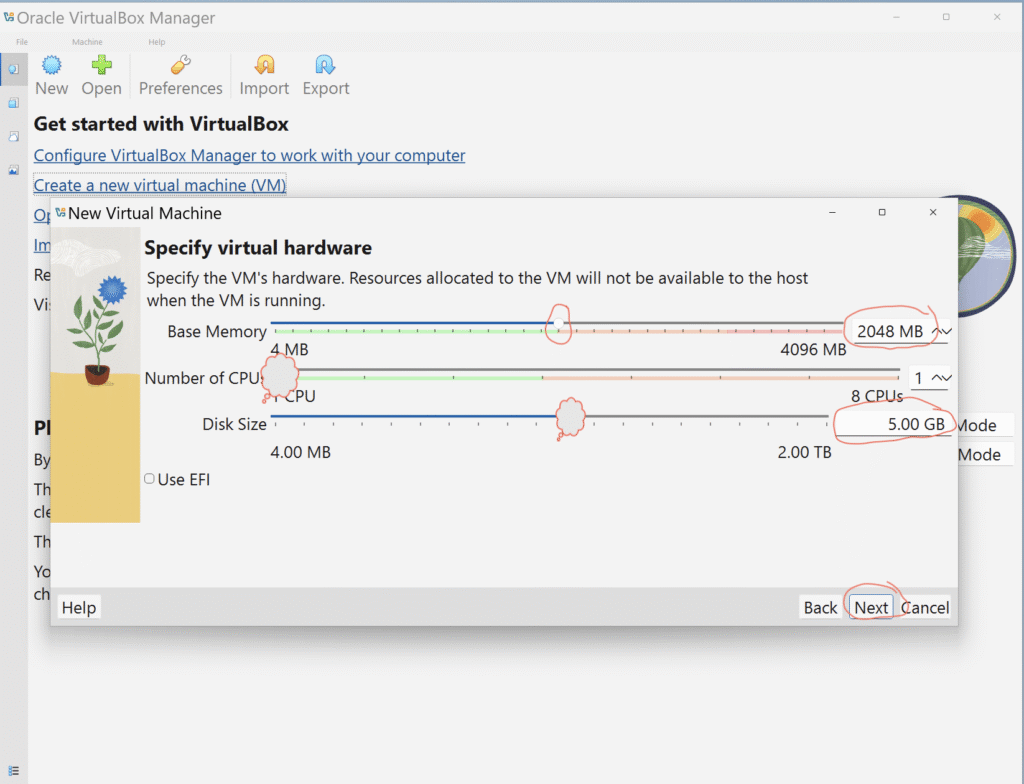
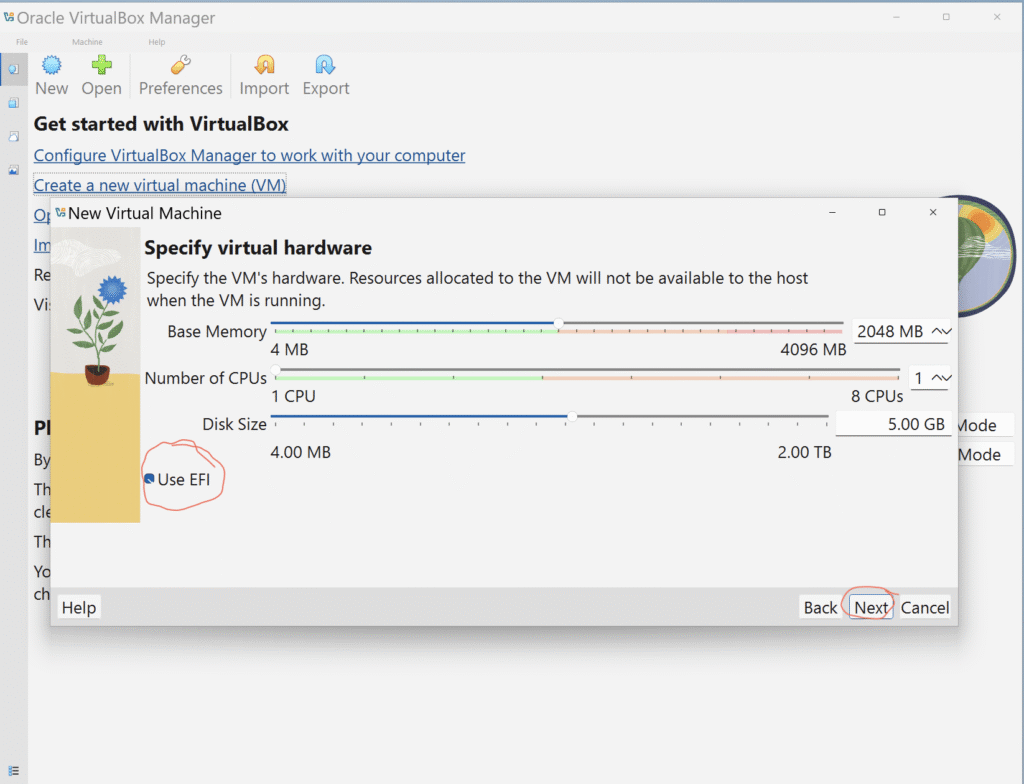
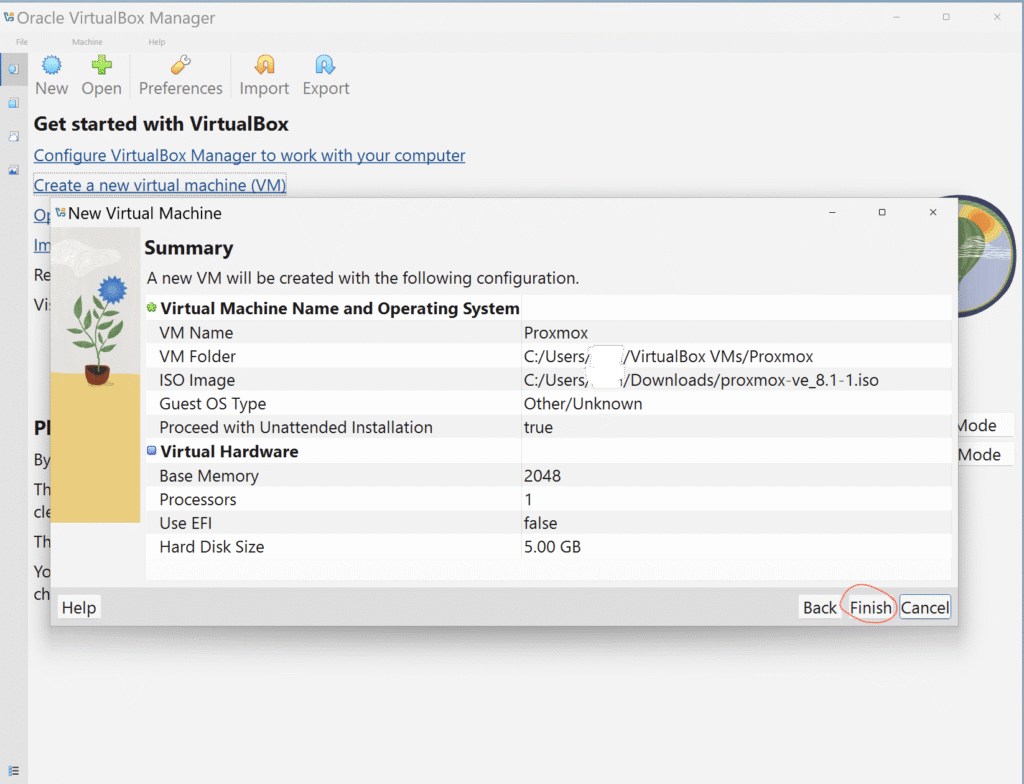
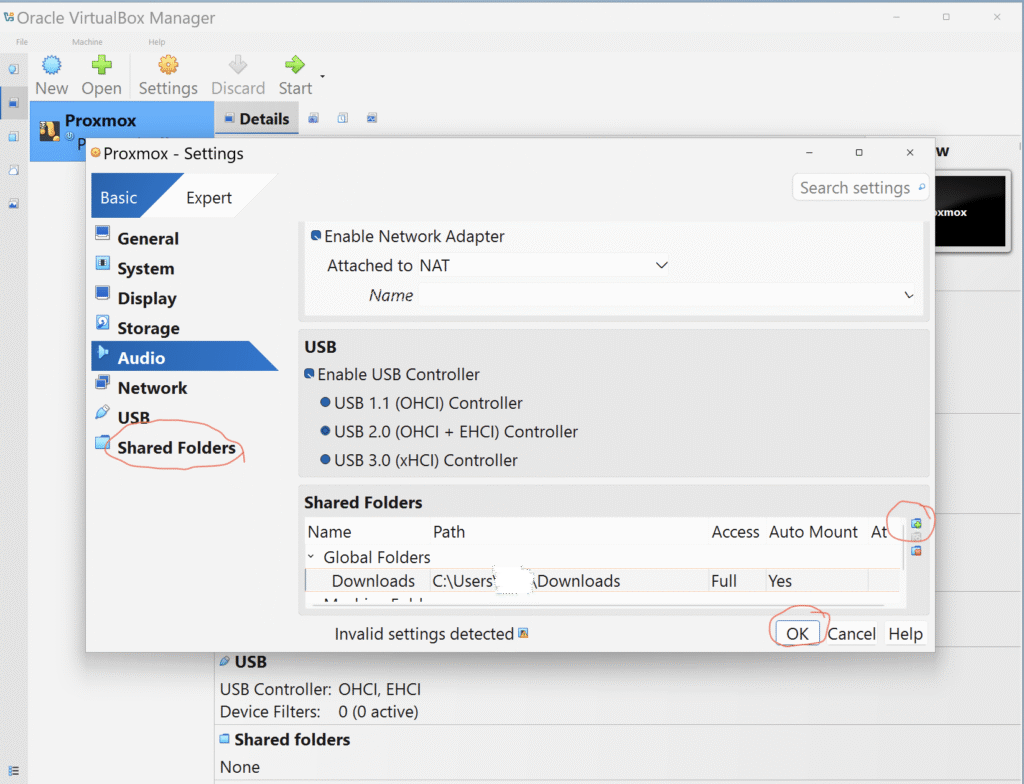
Install Proxmox VE on VirtualBox
for Windows, Intel Mac & Linux
Proxmox
- First
- second
- second
- First
- second
- second
After

Install Proxmox VE on UTM
for Mac
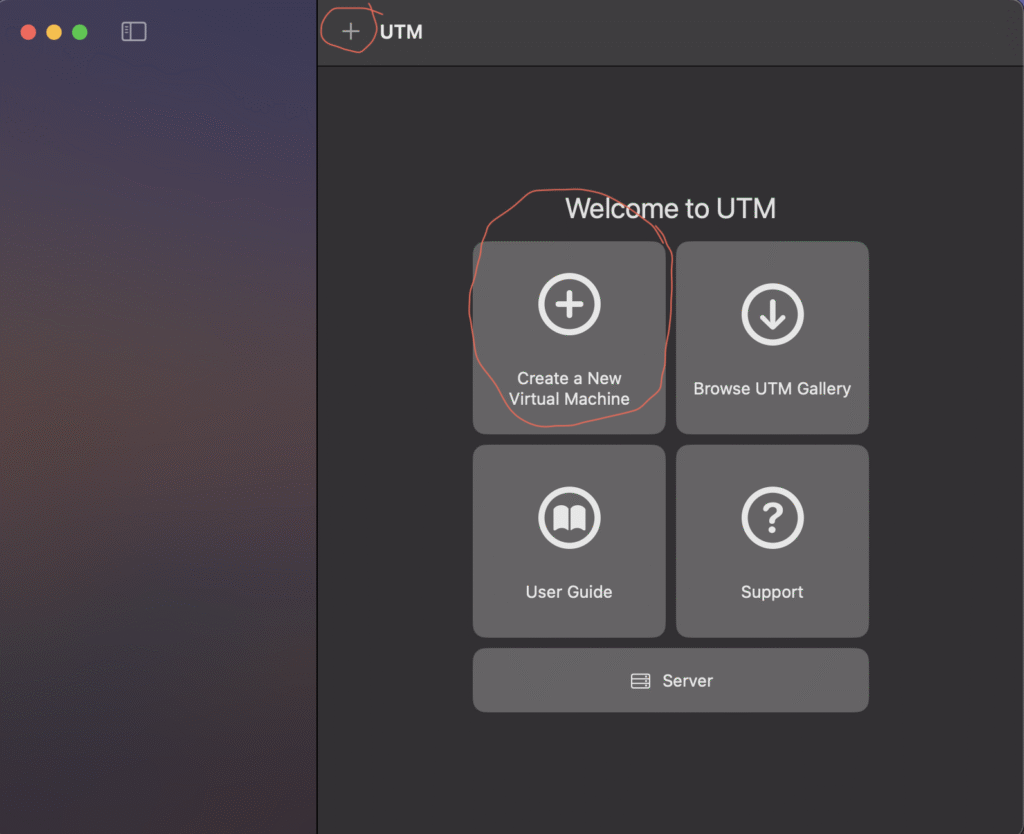
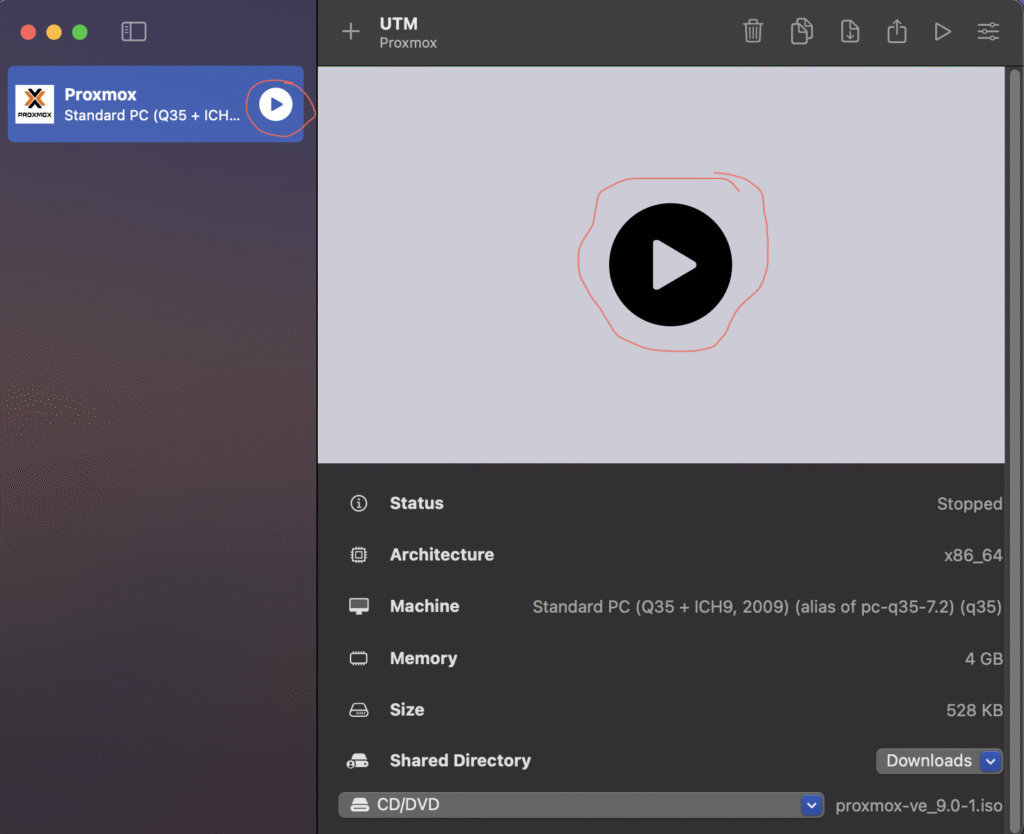
- Next click on CREATE A NEW VIRTUAL MACHINE or the plus (+) sign at the top of the UTM application,
- select EMULATE
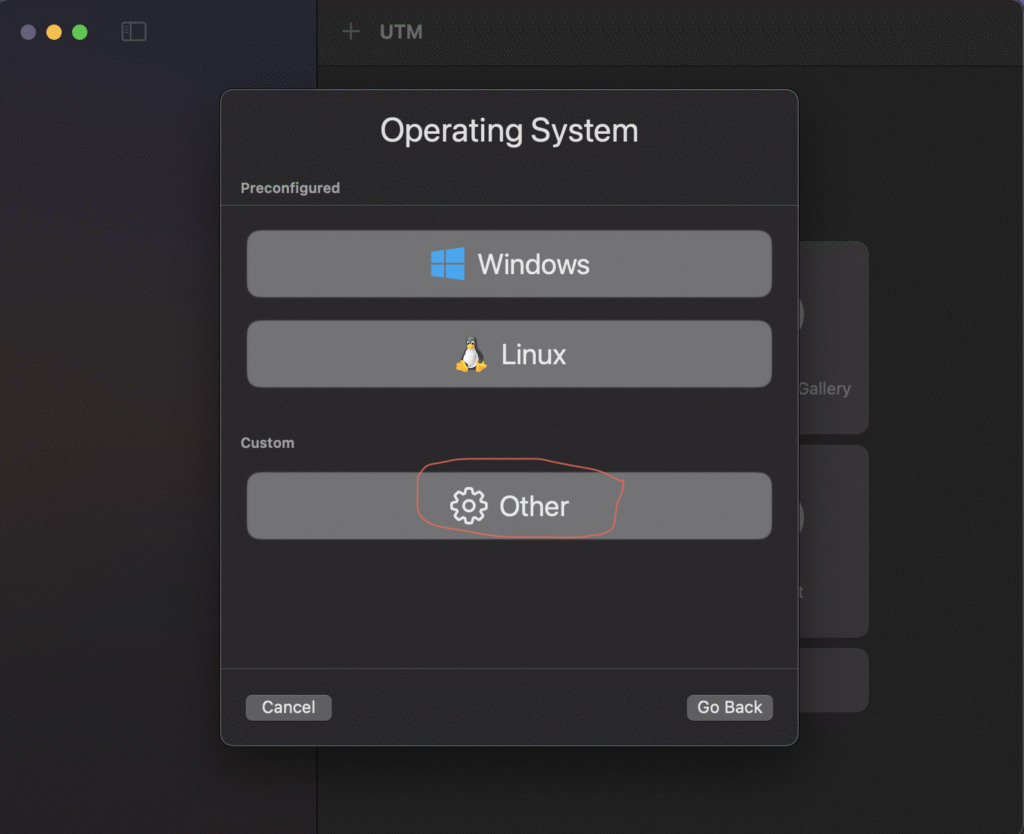
- on the Operating System tab Click on OTHER,
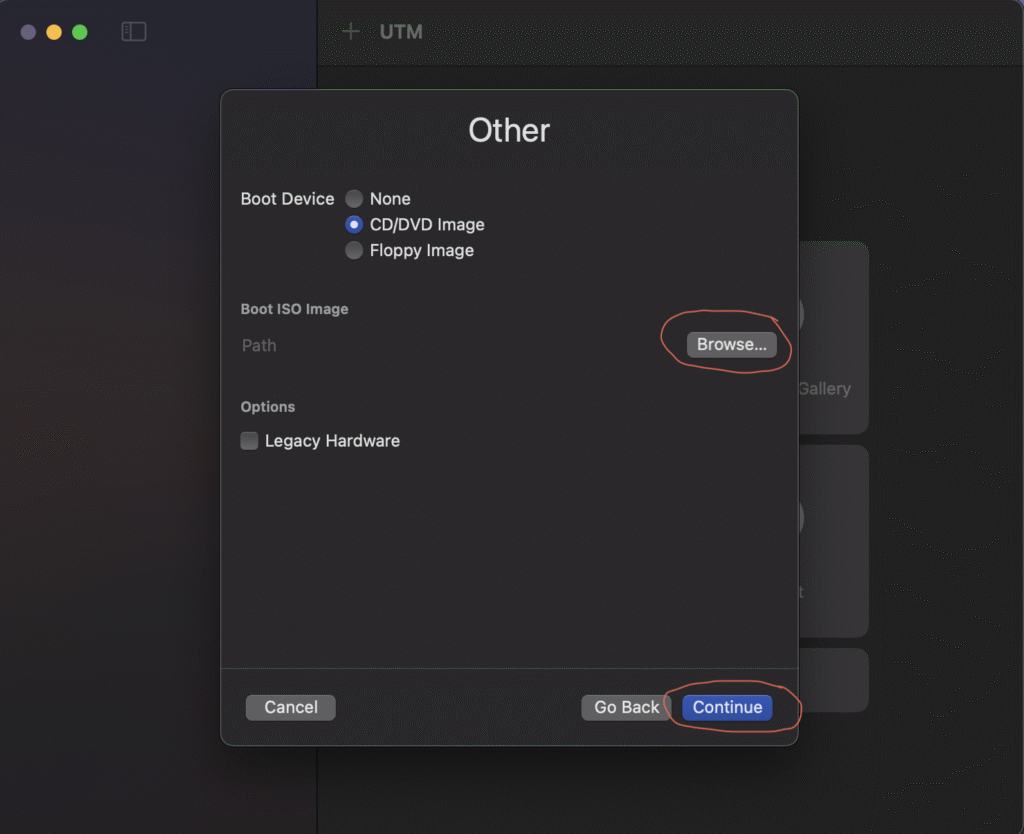
- on the ‘Other’ tab, Select BROWSE then navigate to the folder, where you have your Proxmox ISO file and select it and click CONTINUE,
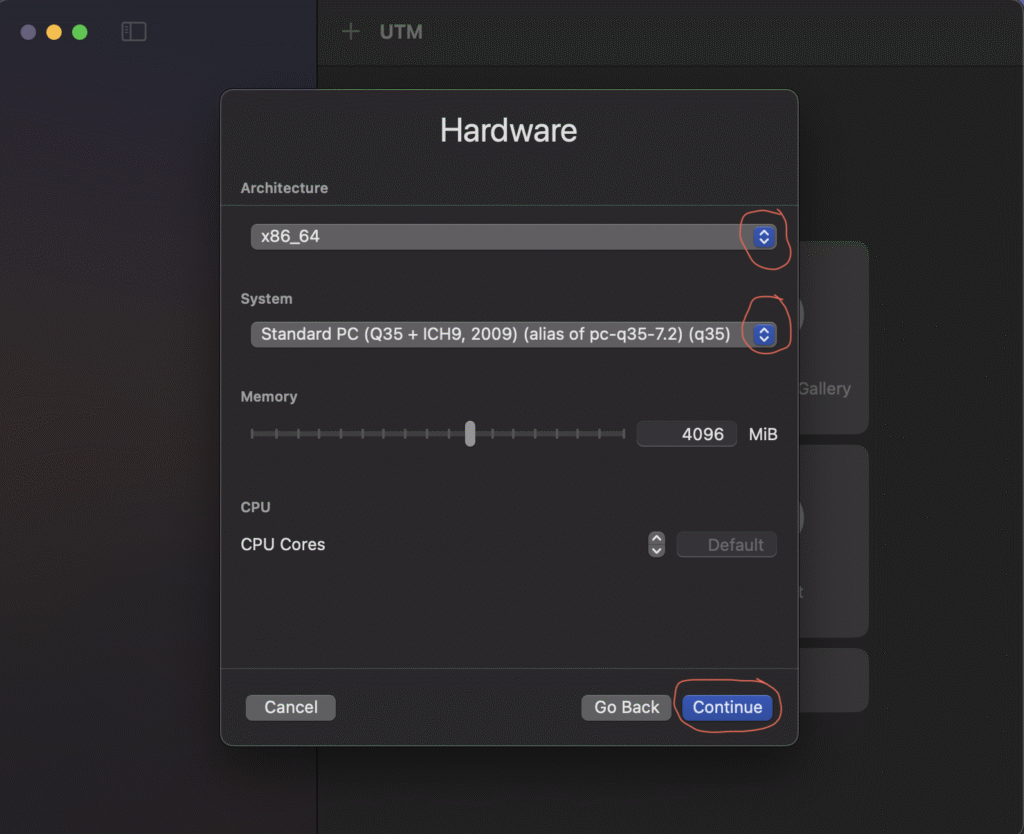
- (for Mac) on the Hardware tab, make sure you have the selections on x86_x64 and Standard PC, give the VM some RAM (4GB is good enough) and click CONTINUE,
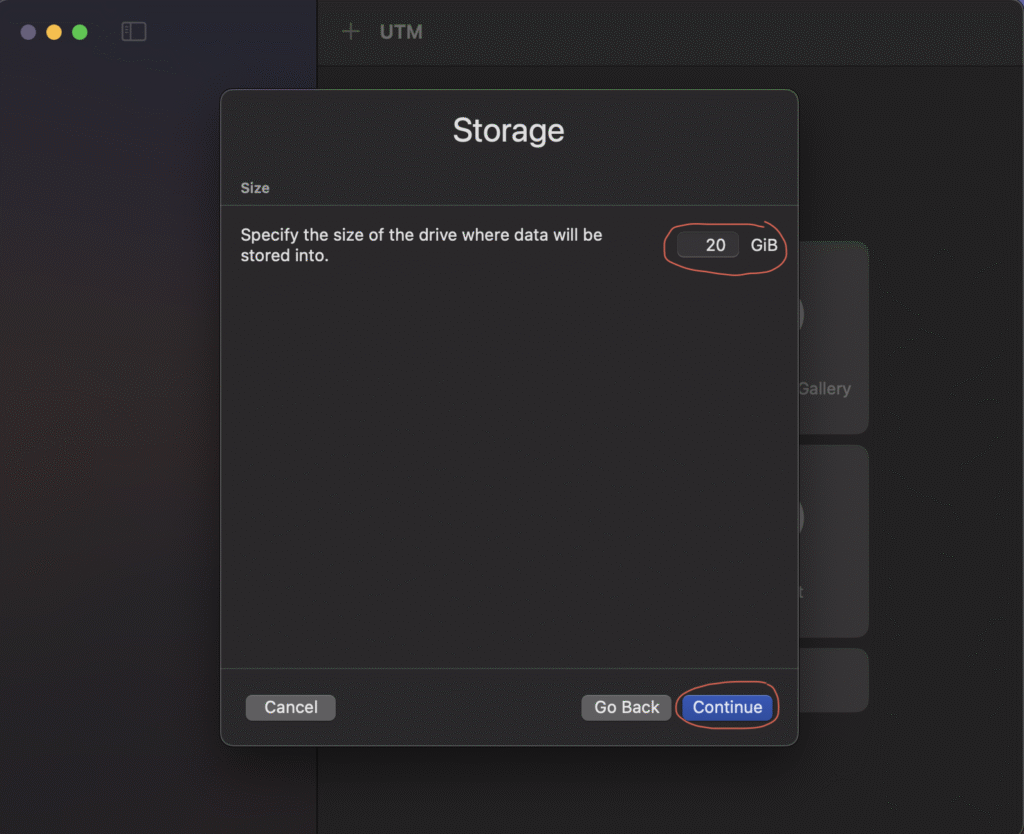
- on the Storage tab allocate HDD space to the VM (20GB is modest enough) and click CONTINUE,
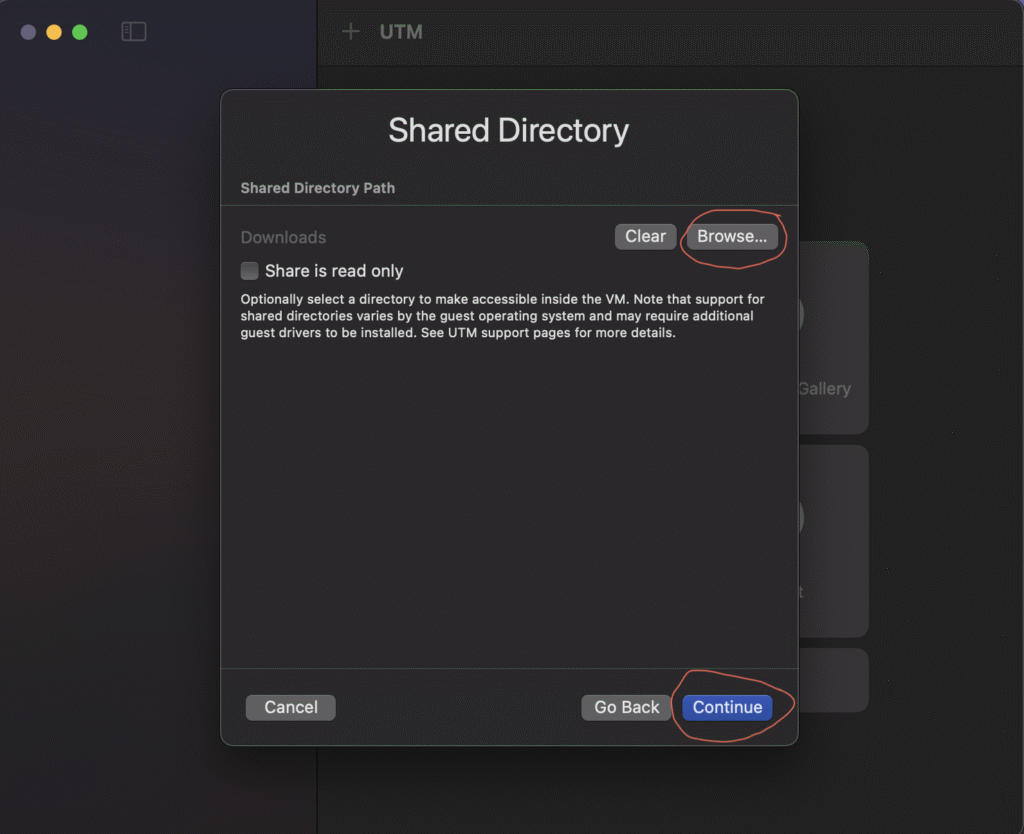
- on the Shared Directory tab click BROWSE to choose a folder on your host system that will be accessible from the VM and click CONTINUE,
- round up the VM creation by giving it a name and remember to tick the OPEN VM SETTINGS box then click on SAVE.
- Once the UTM dashboard opens up you will find our newly created Proxmox Virtual Machine on the left hand column, right click on it and select the EDIT option.
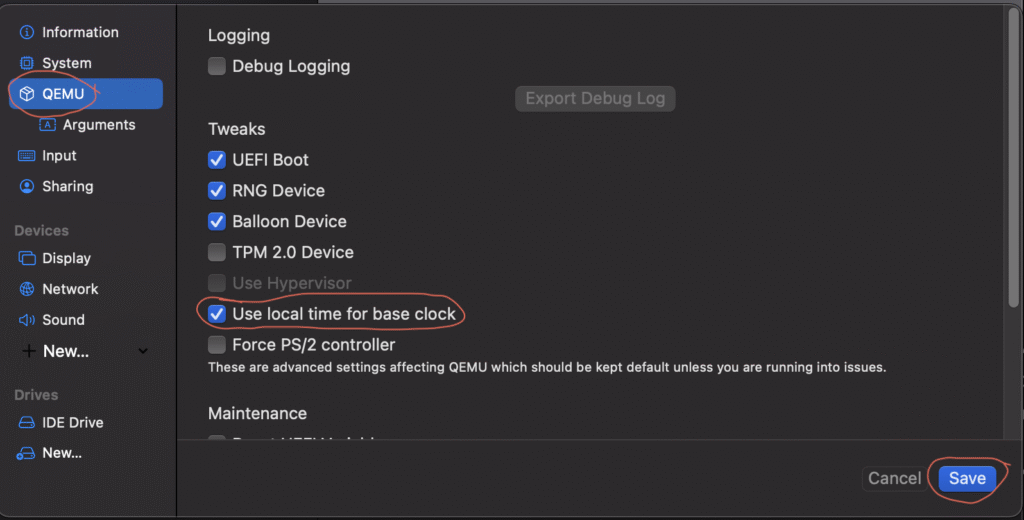
- Select the QEMU menu on the left-hand column and tick the Balloon Device & Use Local Time For Base Clock option,
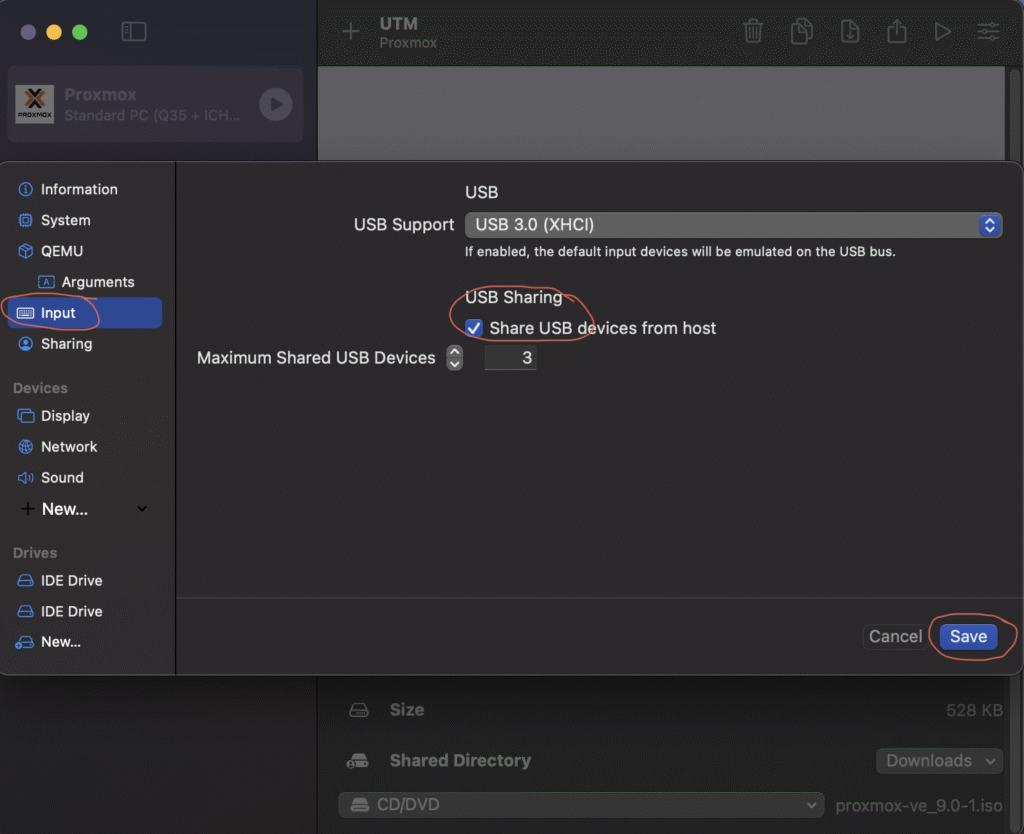
- also select the INPUT menu on the left-hand column and tick the Share USB Device From Host option,
- Now click on the PLAY button to start running the Proxmox Virtual Machine.
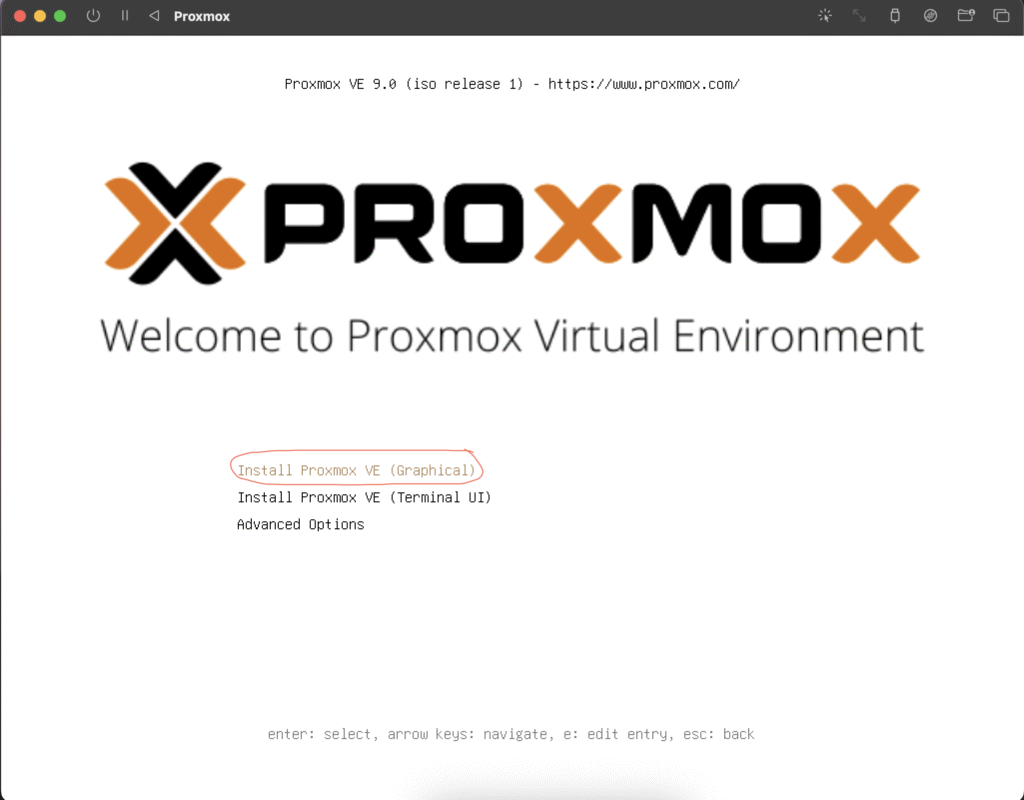


- Once the virtual machine starts up, it will begin installation. Select the first option for a graphical UI installation or the second option for a CLI installation.
- ACCEPT the End User License Agreement,
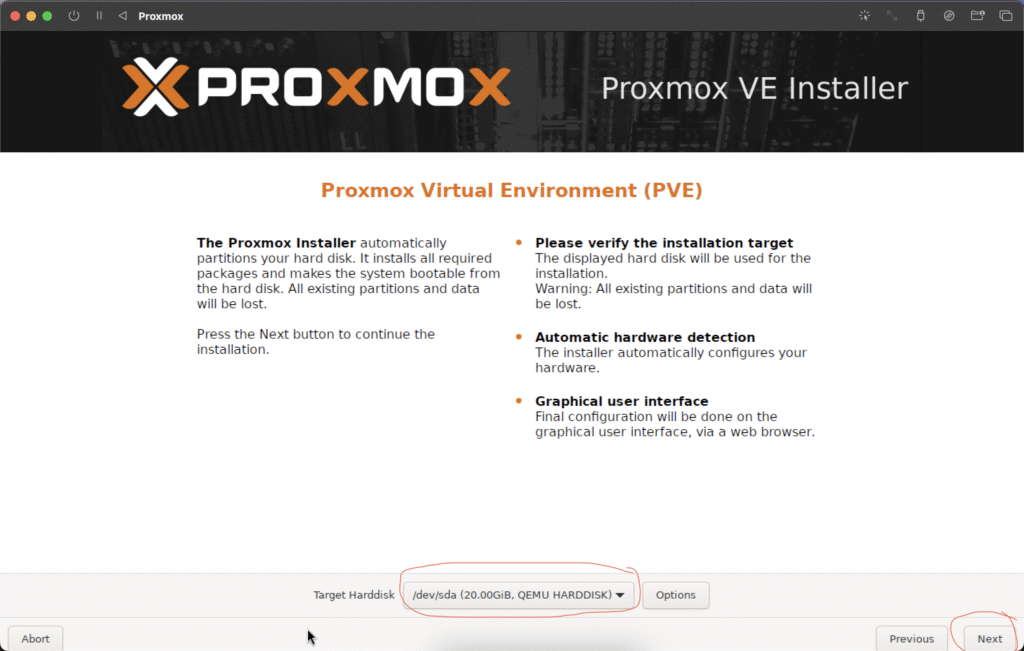
- Choose a suitable HDD device or external media drive to install Proxmox to and click NEXT,
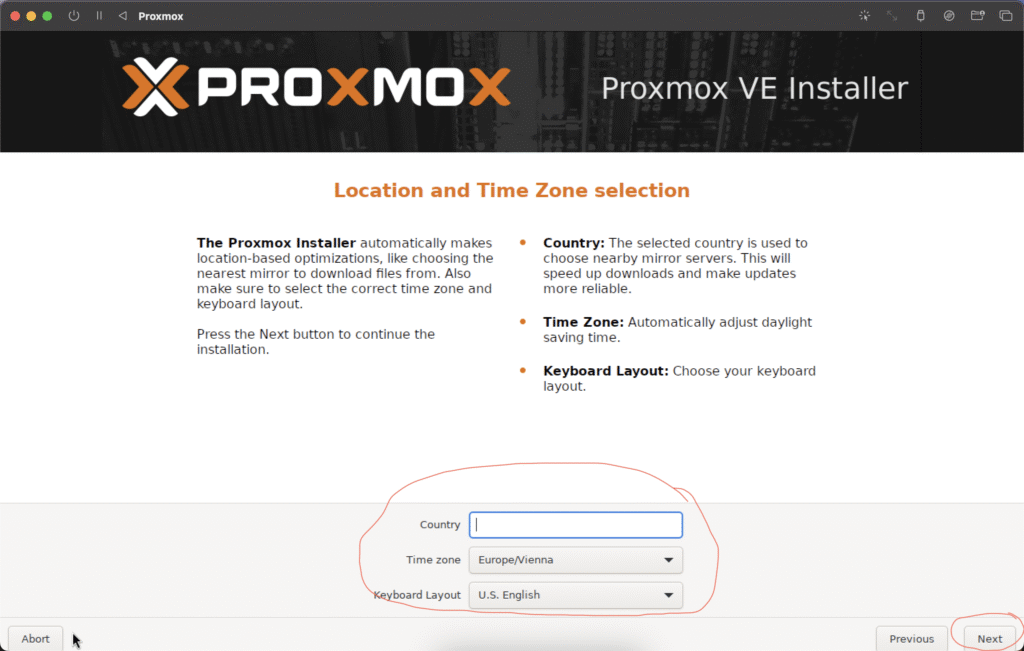
- Select your locality (country) and click NEXT,
- Input your preferred password for the Proxmox application and also a valid email address to receive mails and click NEXT,
- Give your VM a host name (eg, claver.iot.pve) and verify the IP address and submit that the VM will utilize on your local network and click NEXT,
- Verify all the options you had setup and if all looks good then click on the INSTALL button to begin the Proxmox installation.

Once the installation is complete. UTM will automatically restart the Proxmox VM and it will attempt to be reinstalled again, we will need to stop this behavior from the VM startup options.
- Right click on the Proxmox VM and shut it down or quit the virtualization window.
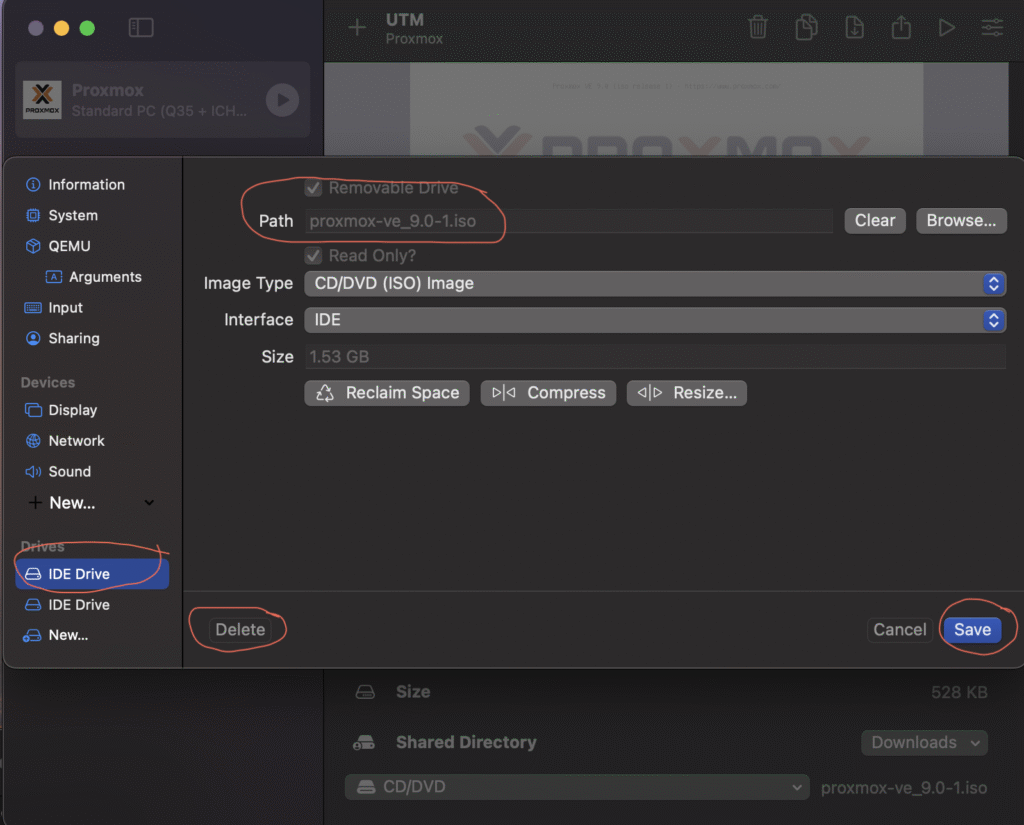
- Right click on the Proxmox VM and select EDIT to tweak it settings,
- On the left-hand menu column, locate the first IDE Drive option and select it, then click on the Remove/Delete button and finally click SAVE.
- Now you can click on the start VM button to begin running the Proxmox VM.
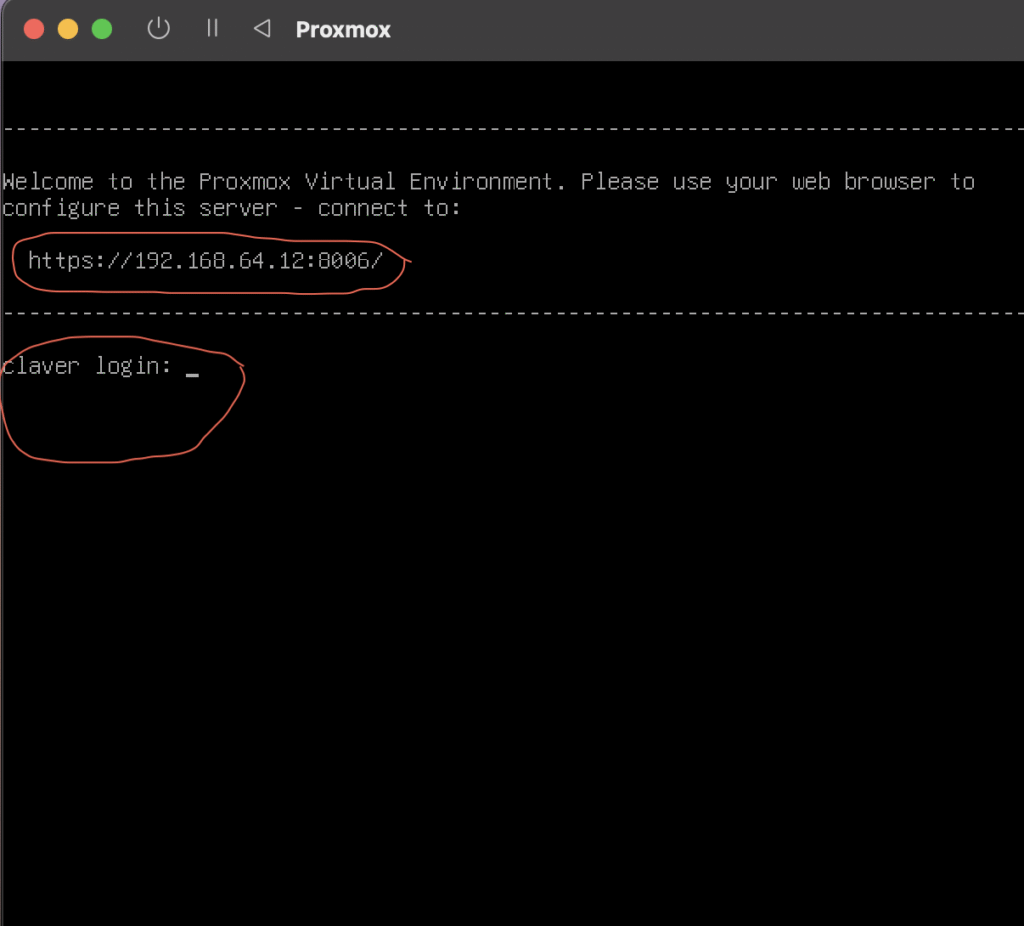
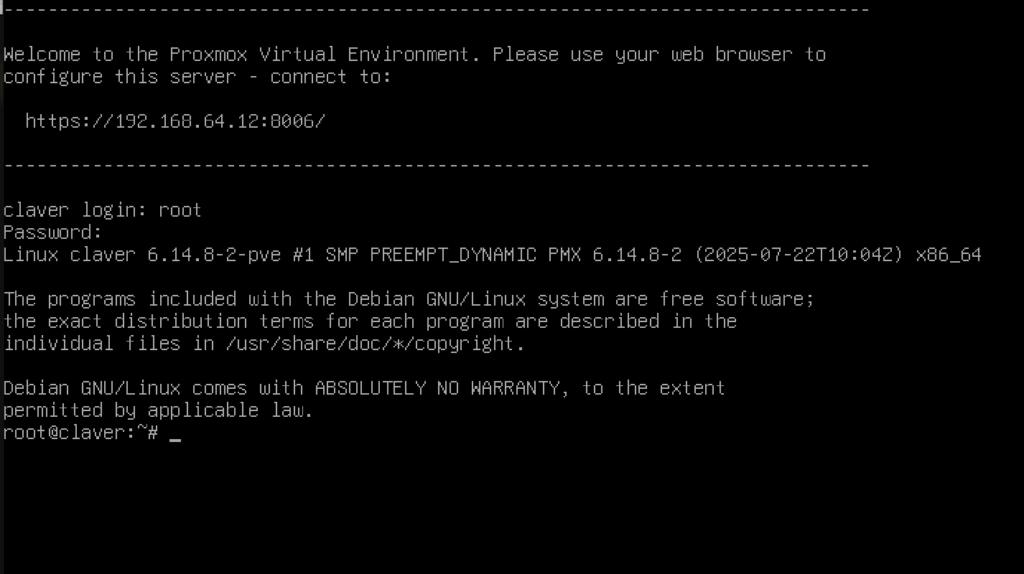
- After it has booted up you will be requested to input your admin username and password (the default. Username is root and the password is that which you had selected when request requested during installation)
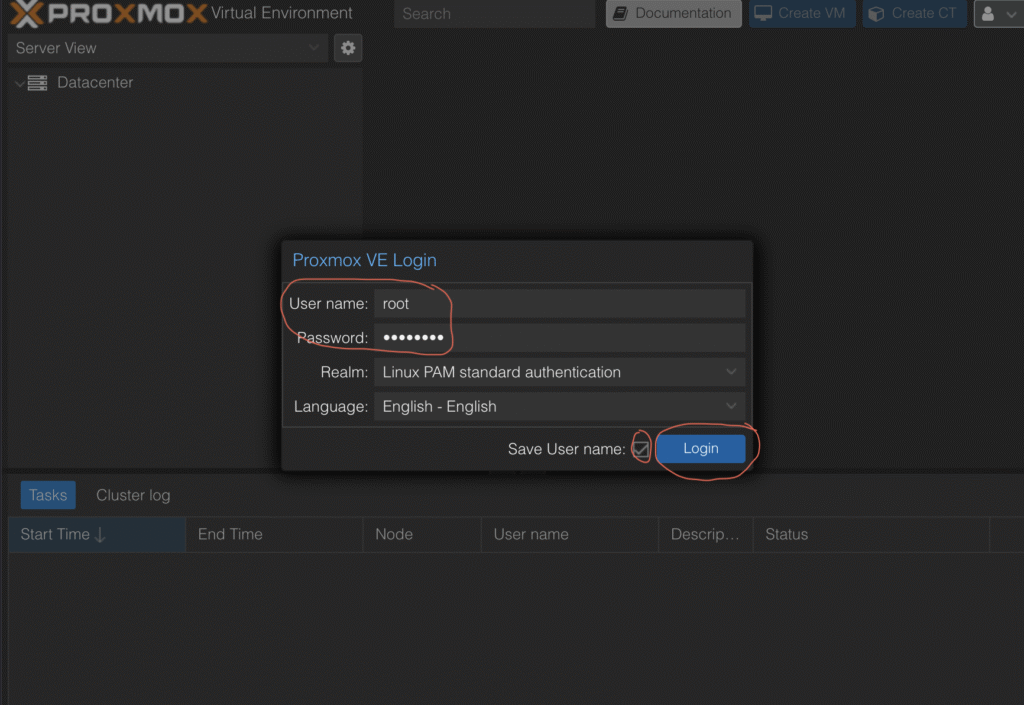
- You can also head over to the Proxmox GUI administration webpage which can be found on your CLI window before/after you are requested to login. Take a look at my own administrative webpage address below,
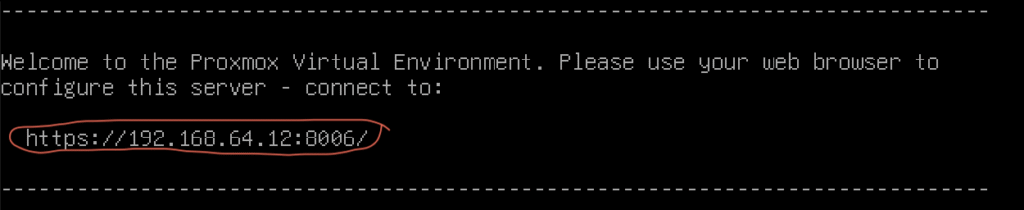
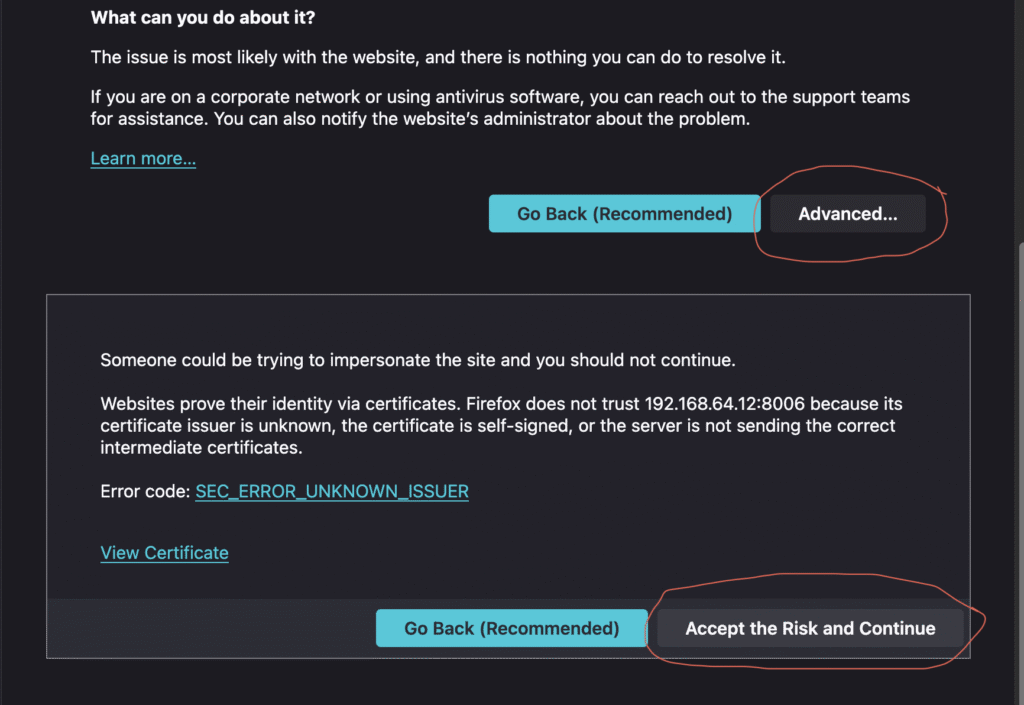
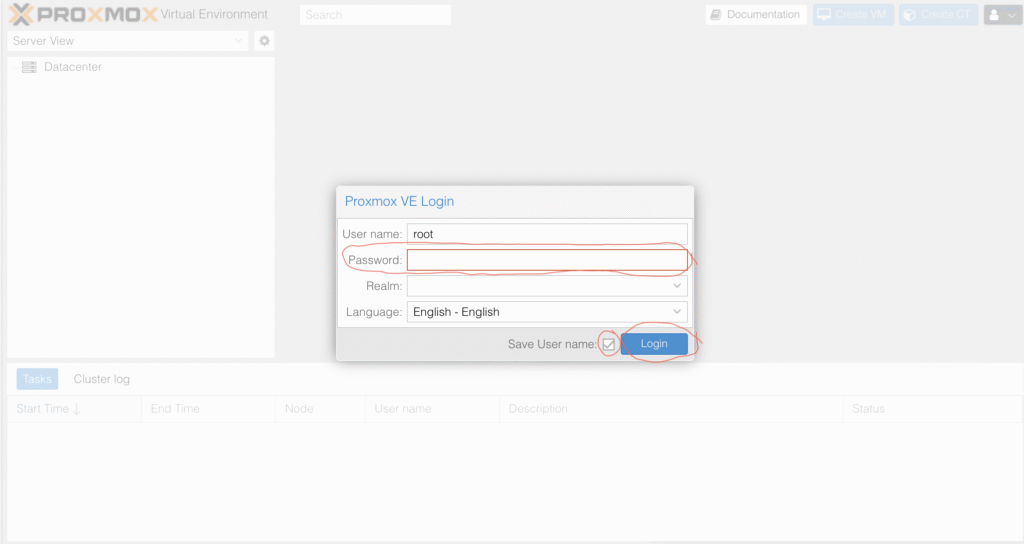
Copy the webpage address and open it up in a new browser tab, once it is open follow the guide in the picture above to open up the login page where you input your username and password. Below is a screenshot of the login page for Proxmox GUI,
PROXMOX POST INSTALLATION GUIDE
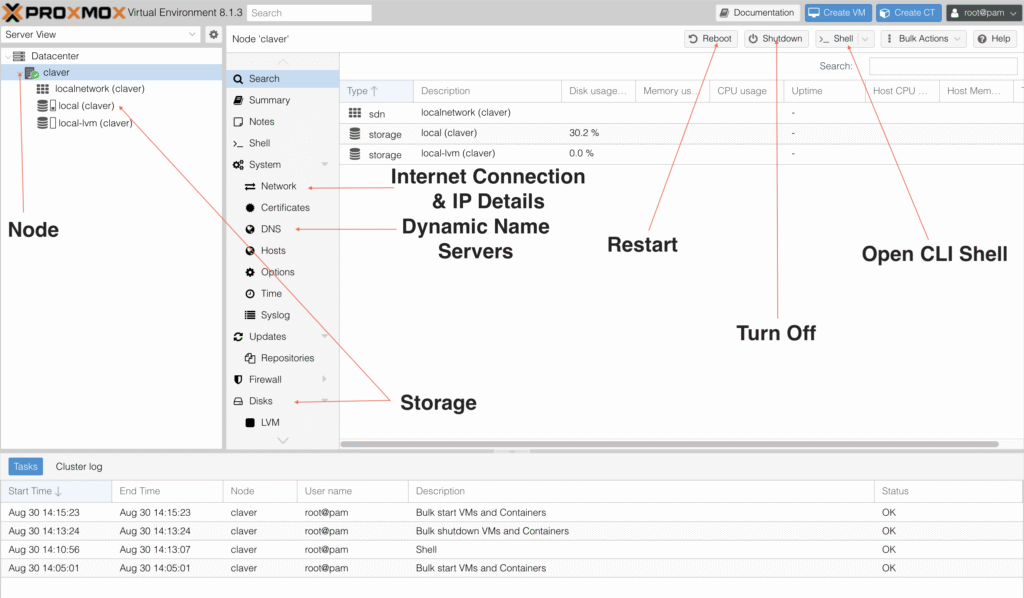
The window below is a typical example of a dashboard page, I have highlighted the most relevant options for you to be acquainted with.
After installing the Proxmox VM and launching it, we will need to run some post installation setup to make sure that the virtual machine operates at its optimal performance for your computer system. Big thanks to tteck for taking out time to create various very useful installation scripts for your Proxmox virtual machine or system. A whole bunch of such scripts can be found on his github page HERE.
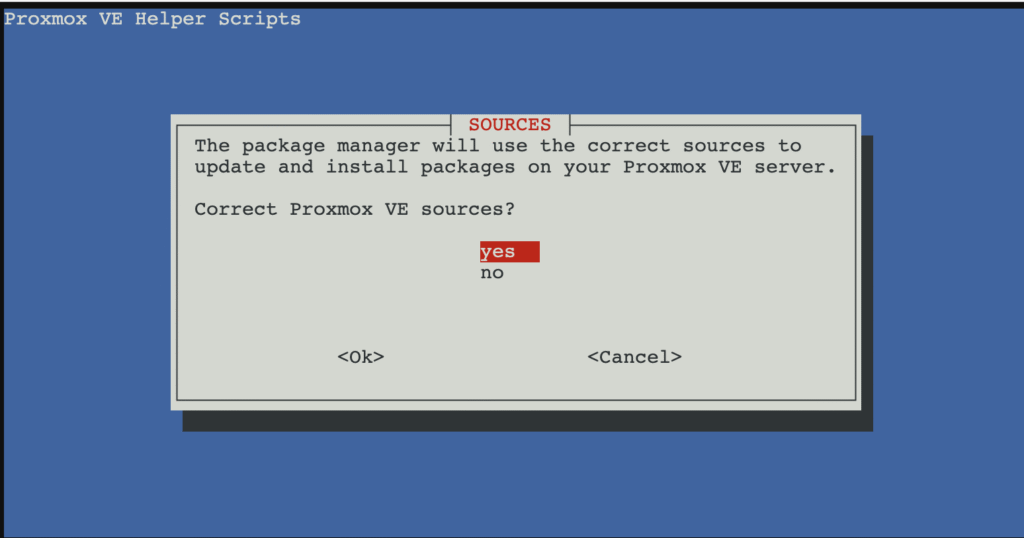
The first thing to do after installing Proxmox is to run it post installation script to clean up various parts of the VM repository directories. Click on the SHELL button on your Proxmox webpage and run the following command,
bash -c "$(wget -qLO - https://github.com/tteck/Proxmox/raw/main/misc/post-pve-install.sh)"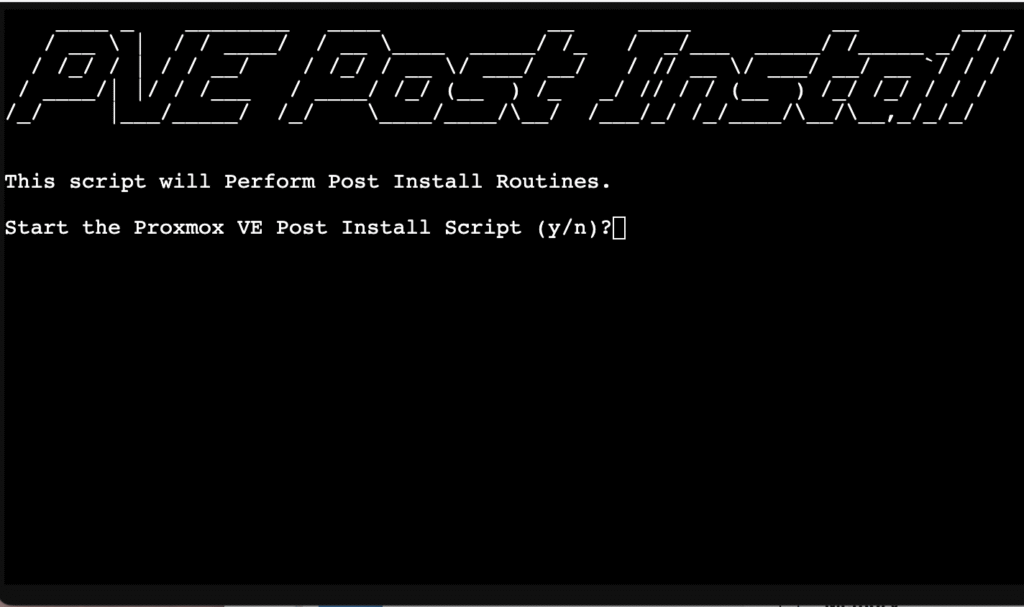
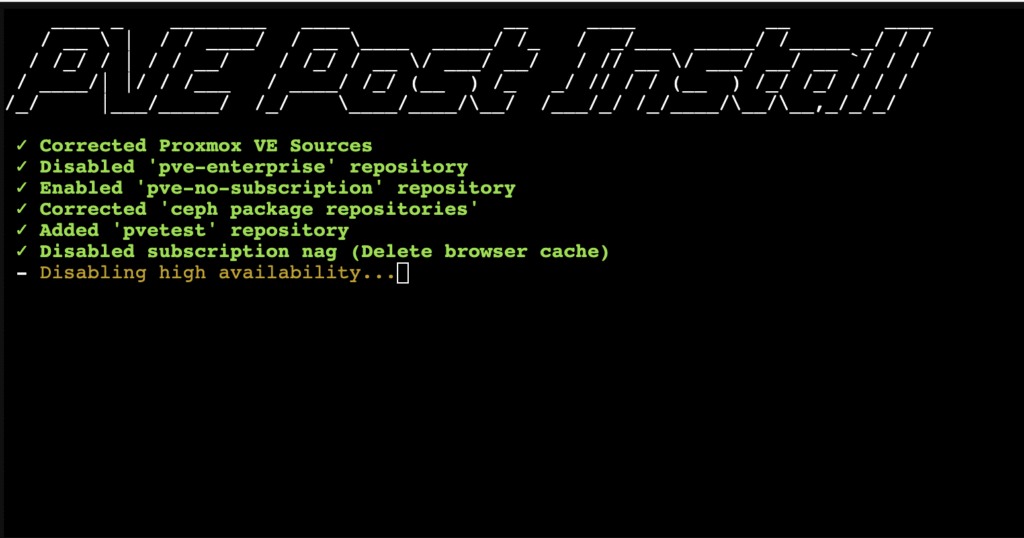
Please take note of the upgrade command on Proxmox, you should upgrade its system by using the tag ‘dist–upgrade‘ (which stands for distribution upgrade) and not the normal upgrade tag that we are used to on other usual Linux operating systems. If you upgrade your Proxmox system using the normal upgrade tag you will end up breaking it (even though Proxmox is based on the linux Operating System).
apt update && apt dist-upgrade -y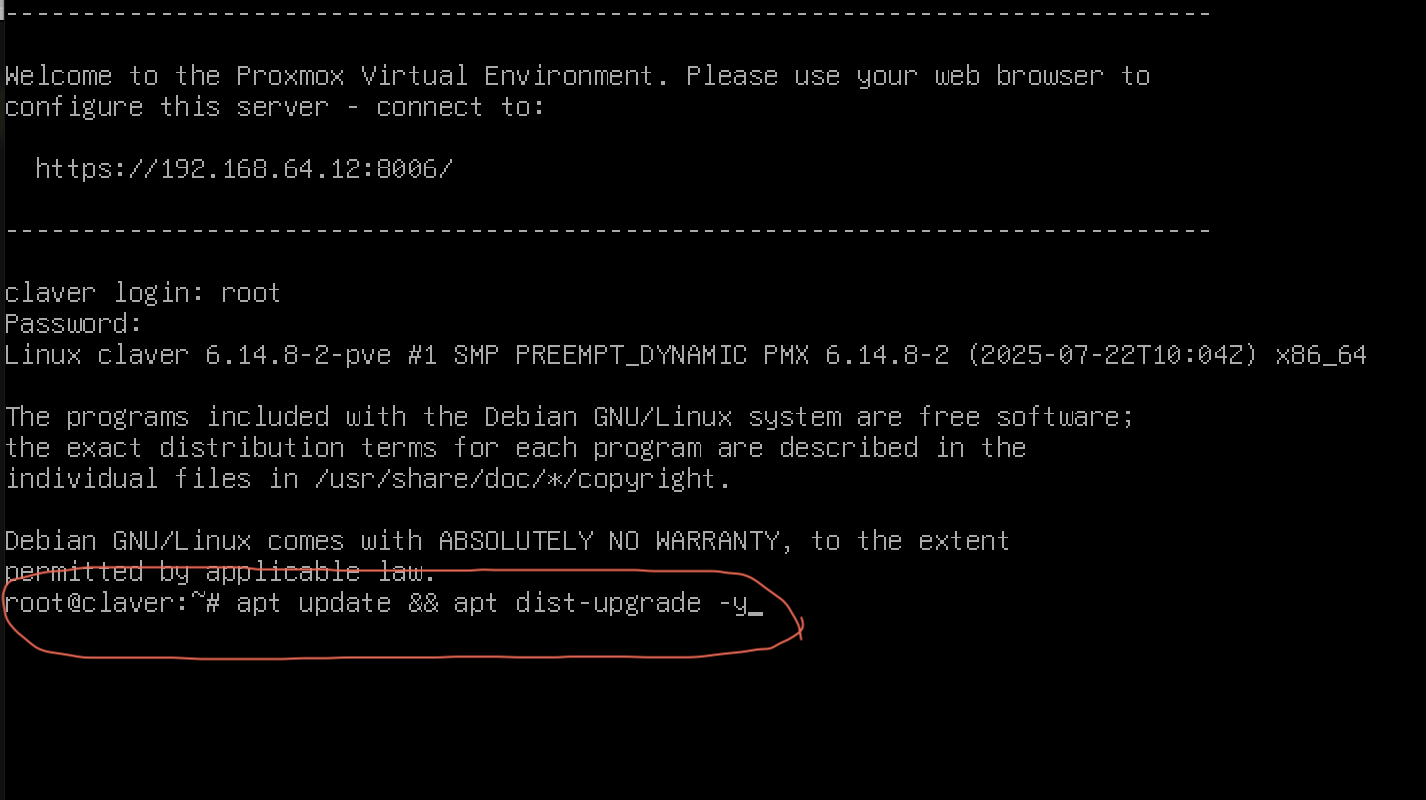

TTECK’s PROXMOX HELPER SCRIPTS
big thanks to the individuals over at the Proxmox Community Scripts Github page we now have the option of easily installing and modifying our virtual machine, using simple scripts and CLI commands via the terminal window on our Proxmox shell.
These Proxmox help bus groups are very robust and light weight due to the fact that they are based off Proxmox LXC containers. Since we will want to use our hardware in a very efficient way, I will be making use of mostly docker containers for most of our server builds and applications. Thankfully, all the software we will need for our home automation can easily be installed via this easy way on Proxmox.
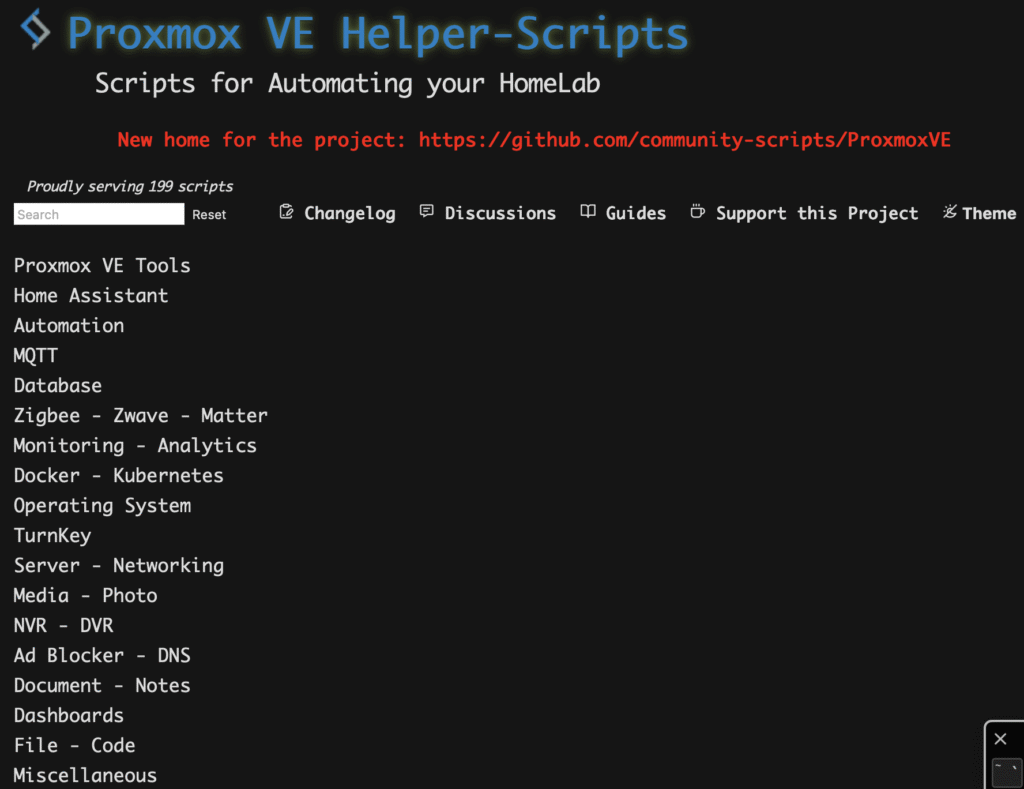
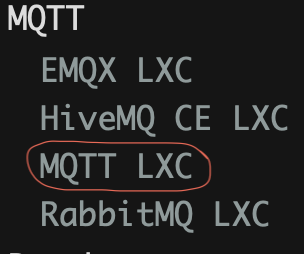
OVERVIEW OF THE AVAILABLE HELPER SCRIPTS
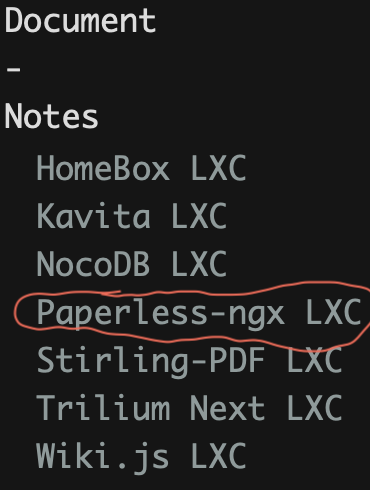
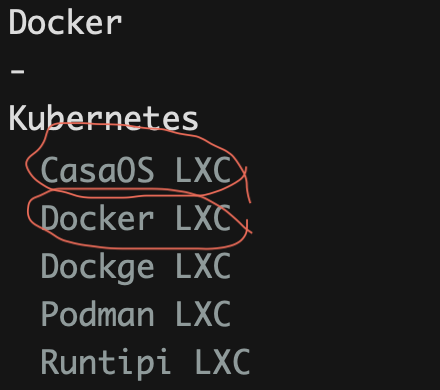
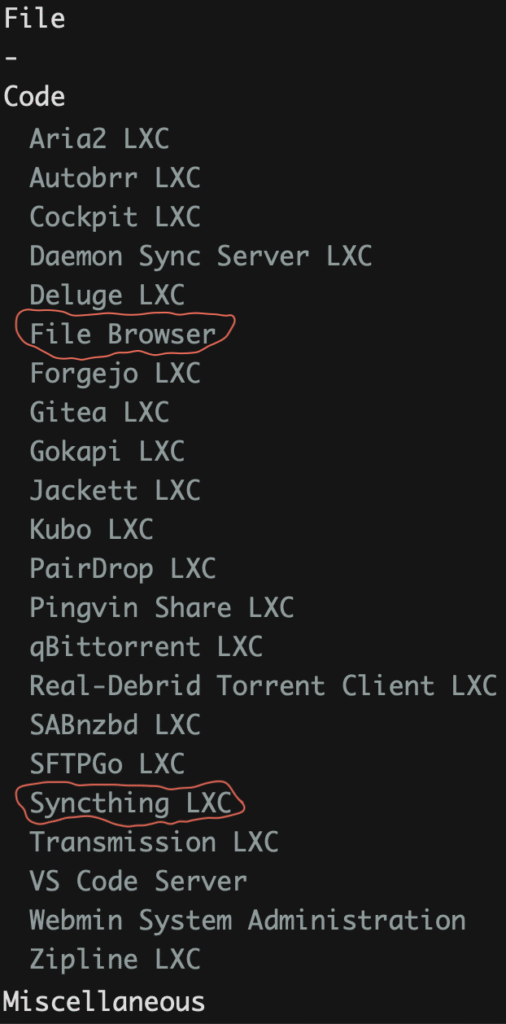
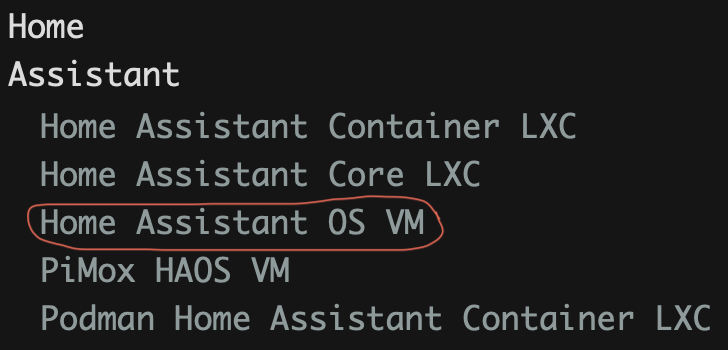
If you wish to have a quick summary of all the available helpers scripts that you can utilize in installing and configuring, software and applications, take a look at the gallery below. I took the liberty of highlighting the software that I have all will cover over the course of automating a home environment.
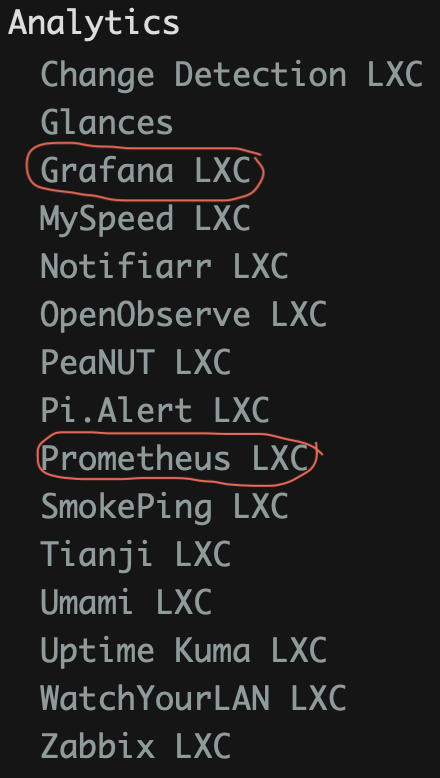
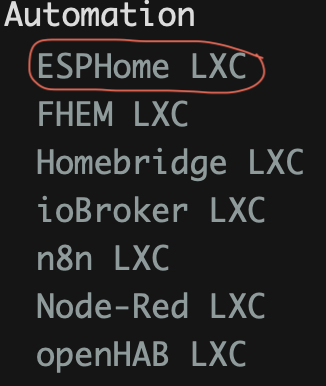
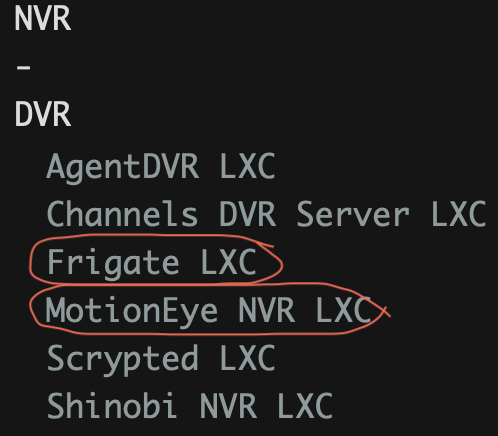
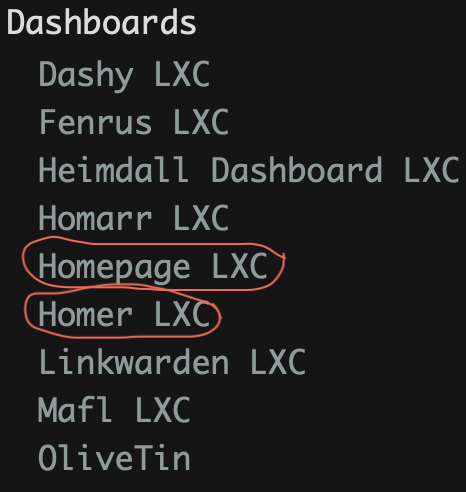
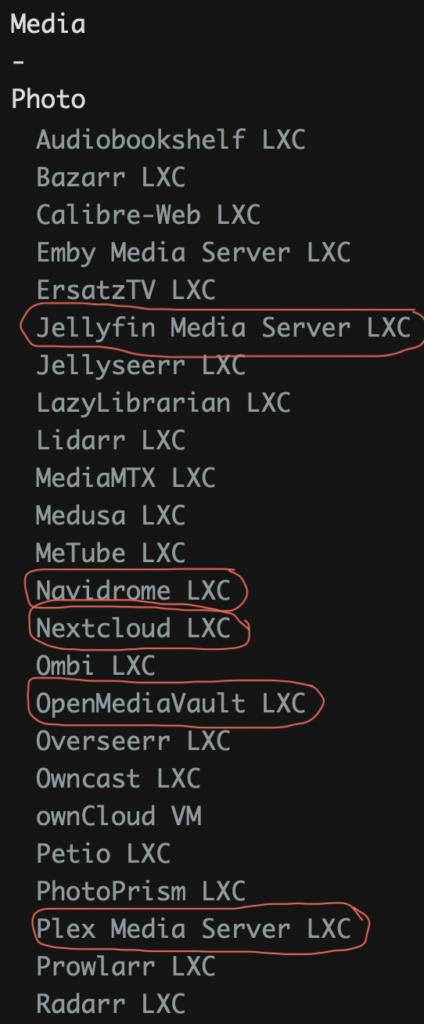
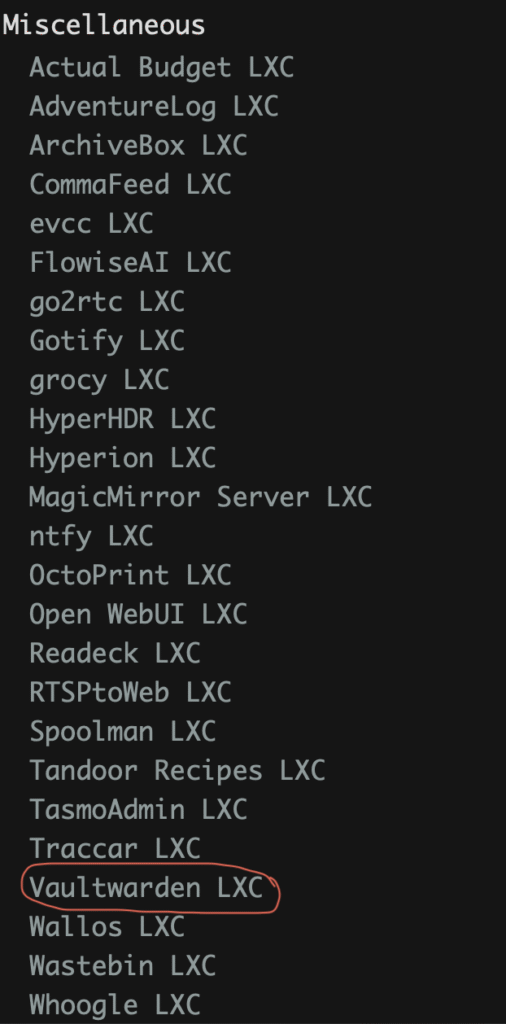
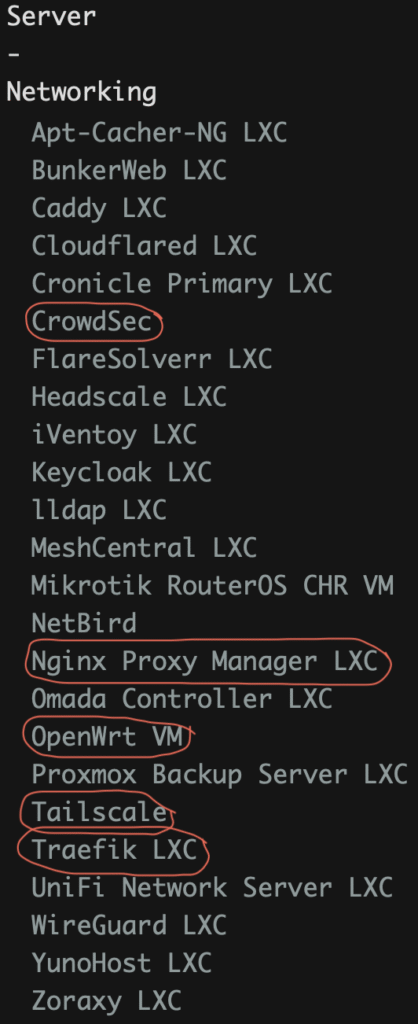
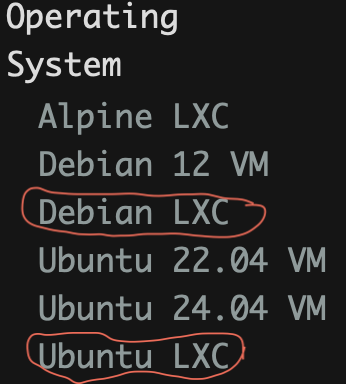
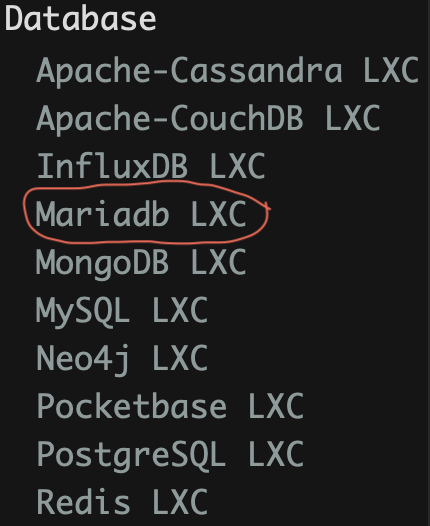
As you can see there are lots of options available when it comes to software to install on your Proxmox installation. As we all know, it is redundant to have two applications performing the same duty on a computer so we will be making use of a single application to run different functions in our home automation server. This will save us time, power, system, resources, and Internet speed. The various applications by recommend you install on a fresh Proxmox node are listed below,
- Operating System: Linux Debian LXC or VM
- Entertainment: Jellyfin Media Server LXC & Navidrome LXC
- Documentation: Paperless NGX LXC, File Browser
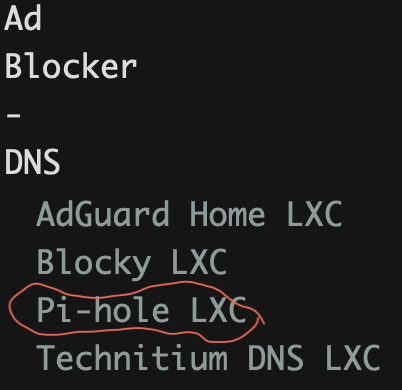
- Security: MotionEye LXC, Vaultwarden
- Microcontroller Configuration: ESPHome LXC
- Home Automation & Control: Home Assistant VM or LXC
- Backup & Restore: Syncthing
- Server Systems Monitoring: Prometheus & Grafana
- Network Assisted Sorage: Open Media Vault
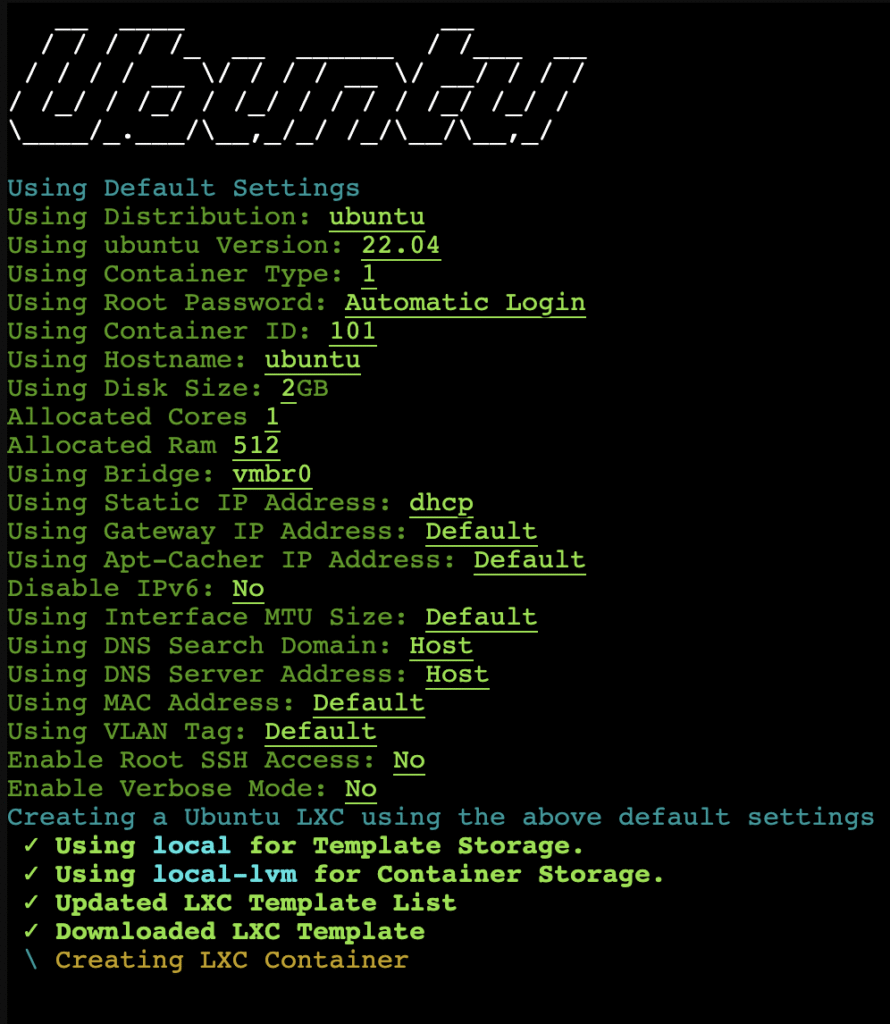
Installation is very quick and you will be able to track its progress via Proxmox Shell CLI, here are my screenshots after installing Debian and Ubuntu LXC Containers,